Dental Lab Equipment
In recent years, CAD/CAM systems have transformed the landscape of dental labs, enabling faster workflows, greater precision, and enhanced patient satisfaction. If you’re new to the world of digital dentistry, understanding how CAD/CAM works and its role in your lab can feel overwhelming. In this beginner’s guide, we’ll break down the basics of CAD/CAM technology, its benefits, and how you can start using it in your dental lab.
What Is CAD/CAM in Dental Labs?
CAD/CAM stands for Computer-Aided Design and Computer-Aided Manufacturing. This technology allows dental technicians to design and fabricate dental restorations—such as crowns, bridges, and veneers—using digital tools rather than traditional manual techniques.
- CAD: The design phase, where software is used to create a 3D model of the restoration.
- CAM: The manufacturing phase, where the digital design is transferred to a milling machine or 3D printer to fabricate the final product.
CAD/CAM systems streamline the process, ensuring accuracy, efficiency, and consistency in dental restorations.
Key Components of a CAD/CAM System
Intraoral Scanner or Desktop Scanner
- Scans a patient’s oral cavity or impression and generates a digital 3D model.
- Example: Desktop scanners convert physical models or impressions into digital files for CAD software.
CAD Software
- Software that allows you to design the restoration virtually.
- Popular options include Exocad, 3Shape, and DentalCAD.
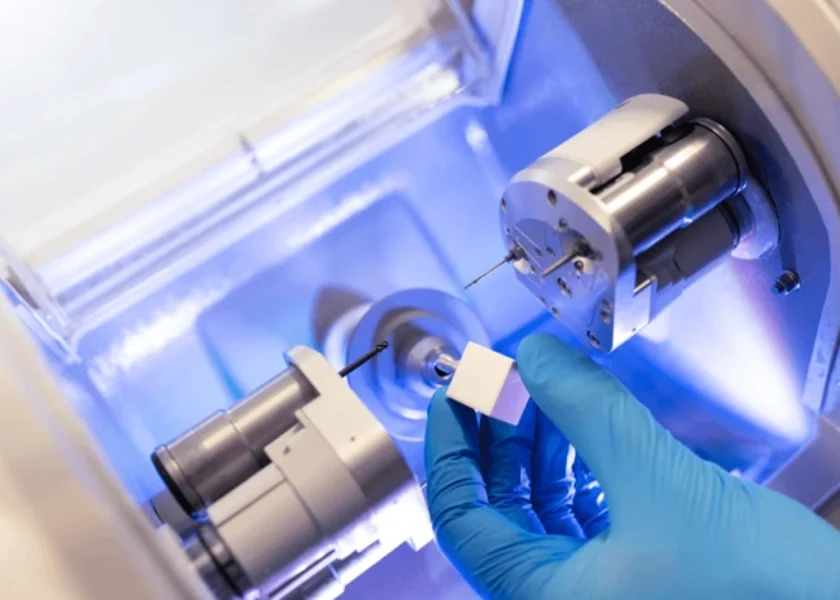
CAM Milling Machine or 3D Printer
- Fabricates the restoration using materials like zirconia, lithium disilicate, PMMA, or wax.
- Wet or dry milling machines can be used, depending on the material and workflow.
Sintering Furnaces (Optional)
- Used to sinter zirconia restorations, ensuring durability and optimal properties.
Benefits of CAD/CAM Systems for Dental Labs
Improved Accuracy and Precision
- Digital designs ensure restorations fit perfectly, reducing adjustments and remakes.
Faster Turnaround Times
- CAD/CAM systems streamline workflows, allowing you to produce restorations in a fraction of the time.
Consistency and Repeatability
- Digital technology eliminates variability, ensuring consistent quality for all restorations.
Enhanced Aesthetics
- CAD/CAM allows for detailed design and natural-looking restorations, particularly with advanced materials like zirconia and lithium disilicate.
Reduced Manual Labor
- Technicians spend less time on labor-intensive tasks, freeing up time for creativity and advanced cases.
Step-by-Step Process for Using CAD/CAM Systems
1. Scanning the Case
- Use an intraoral scanner to scan the patient’s oral cavity or a desktop scanner to digitize a physical impression.
- The scanner generates a precise digital 3D model.
2. Designing the Restoration
- Import the 3D scan into CAD software.
- Use the software tools to design the restoration, such as crowns, bridges, or veneers. Adjust contours, occlusion, and margins to ensure an optimal fit.
3. Material Selection
- Choose the appropriate milling material based on the case requirements:
- Zirconia for strength (ideal for posterior restorations).
- Lithium Disilicate for aesthetics (perfect for anterior restorations).
- PMMA or wax for temporary crowns or diagnostic models.
4. Fabrication with CAM
- Send the finalized CAD design to the milling machine or 3D printer.
- The CAM system mills or prints the restoration based on the digital design.
5. Finishing and Polishing
- After milling, perform finishing tasks such as sintering (for zirconia), staining, glazing, and polishing to enhance the restoration’s aesthetics and strength.
6. Delivery
- The completed restoration is ready for delivery to the dentist and, ultimately, the patient.
Tips for Beginners Starting with CAD/CAM Systems
Start with Training
- Invest time in learning the CAD/CAM software and machine settings. Many manufacturers offer beginner tutorials and support.
Choose User-Friendly Tools
- Start with intuitive CAD software and reliable milling machines that are beginner-friendly.
Begin with Simple Cases
- Focus on single-unit restorations, like crowns, before advancing to bridges or full-arch cases.
Maintain Your Equipment
- Regular maintenance of scanners, milling machines, and tools ensures accuracy and longevity.
Partner with Experts
- Work with suppliers or experienced technicians for guidance on materials and workflows.
Why Digital Dentistry Is the Future
CAD/CAM systems not only improve accuracy and efficiency but also give dental labs a competitive edge. By embracing digital dentistry, you can provide high-quality, reliable restorations while saving time and reducing costs.
Conclusion
Getting started with CAD/CAM systems in your dental lab doesn’t have to be complicated. By understanding the key components, benefits, and workflows, you’ll be able to integrate digital tools seamlessly into your practice. Whether you’re fabricating single crowns or complex restorations, CAD/CAM technology ensures precision, consistency, and patient satisfaction.
Explore our online store for CAD/CAM systems, dental scanners, milling machines, and beginner-friendly tools to bring digital dentistry to your lab today!